
Interior Home Painting Tips for a Beautiful Lasting Finish

A freshly painted room can look disappointing within weeks if the wall was dusty, damp, poorly primed, or rushed between coats. The best finish rarely comes from the most expensive paint alone. It comes from the quiet work before the first roller mark, and the patience after the final coat.
Interior Home Painting is part design choice and part surface science. Indian homes often deal with plaster dust, hairline cracks, monsoon humidity, seepage stains, and walls that have seen several paint layers over the years. A lasting finish starts by reading the wall correctly, then matching the preparation, primer, paint, and technique to that surface.
Start with the wall, not the colour card
Paint brands offer hundreds of shades, but the wall decides how well any shade will look. Before choosing a finish, inspect the surface in daylight and at night under artificial light. Low-angle light will reveal bumps, cracks, flaky paint, roller ridges, and uneven plaster.
Run your palm across the wall. If it feels chalky, dusty, or powdery, paint will not bond well. If old paint comes off on tape, scrape and sand it back. If there are round damp patches, peeling near skirting, or brownish stains, address the moisture source first. Painting over dampness only hides the problem for a short time.
Look for these common issues before buying paint:
Hairline cracks
Open them slightly with a scraper, clean the dust, and fill with a suitable crack filler.
Peeling paint
Remove all loose layers. Feather the edges with sandpaper so the repair does not show through.
Damp stains
Fix seepage, plumbing leaks, terrace waterproofing, or exterior wall cracks before repainting.
Fungal spots
Clean and treat the area before priming. Kitchens, bathrooms, and poorly ventilated rooms need extra care.
Uneven patches
Use putty only where needed, then sand smooth. Too much putty can create a weak, powdery base if not sealed well.
Good painters spend more time preparing than painting. That is not slow work. It is the part that makes the finished wall look calm, even, and durable.
Clean, fill, sand, and prime in the right order
The right sequence matters. If you sand before scraping, loose paint remains hidden. If you fill before cleaning, dust weakens the repair. If you skip primer, the final colour may look patchy, especially on repaired areas.
A reliable order is:
Remove curtains, switch plates, wall hooks, and small fittings.
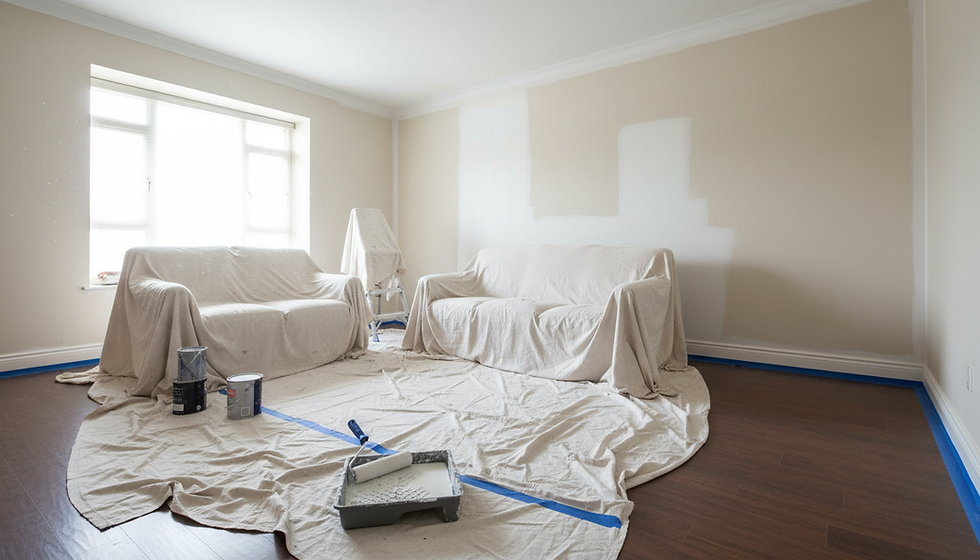
Cover floors, furniture, wardrobes, and exposed edges.
Scrape loose paint and sand raised patches.
Clean dust with a dry cloth or vacuum where possible.
Treat stains, fungus, or damp-affected areas.
Fill cracks and dents.
Sand repairs once dry.
Apply primer.
Sand lightly if the primer raises roughness.
10. Apply finish coats with proper drying time.
Primer is not just a white undercoat. It improves adhesion, seals absorbent surfaces, and helps the topcoat dry evenly. On fresh plaster or putty, primer is essential. On old but sound paint, primer may still be needed if the colour change is dramatic, if stains are present, or if patches have been repaired.
Choose paint by room conditions
A beautiful wall in a bedroom may fail quickly in a kitchen. Each room has its own wear pattern, moisture level, and cleaning need. The right sheen and paint type can make maintenance easier.
Room or surface | Practical paint choice | Why it works |
Living room | Washable emulsion in matte or soft sheen | Looks refined and handles light cleaning |
Bedroom | Low-odour emulsion with a calm finish | Comfortable for daily use and easy on the eye |
Kitchen | Washable or stain-resistant paint | Better against splashes, oil marks, and wiping |
Bathroom dry areas | Moisture-resistant paint | Helps in humid conditions with good ventilation |
Children’s room | Scrubbable finish | Handles pencil marks, fingerprints, and frequent cleaning |
Ceilings | Flat finish | Hides minor unevenness and reduces glare |
Doors and trims | Enamel or suitable water-based trim paint | Resists handling and gives a sharper edge |
Matte finishes hide minor defects but are harder to clean. Higher sheen finishes clean more easily but show wall imperfections. If the plaster is not very smooth, avoid glossy wall finishes unless the surface has been prepared to a high standard.
For Indian homes, consider ventilation and odour too. Low-VOC or low-odour paints are useful when a family must occupy the home soon after painting. Still, keep rooms ventilated during and after painting, especially in humid weather.
Test colour in the actual room
Colour changes with light, flooring, furniture, and ceiling height. A shade that looks soft in a showroom can turn too yellow under warm LED lights or too cold beside grey flooring.
Paint a sample patch on at least two walls. Check it:
In morning light
In afternoon light
Under warm and cool artificial lights
Beside curtains, sofa fabric, woodwork, or tiles
Do not judge colour from a tiny strip alone. Larger patches reveal undertones. Off-whites may lean cream, pink, grey, or green. Beige can look muddy in low light. Deep colours may need extra coats and careful cutting along edges.
A practical rule is to choose slightly cleaner and lighter colours for rooms with limited daylight. For sunny rooms, warmer neutrals and deeper accents can hold their character better. If the ceiling is low, keeping it lighter than the walls can make the room feel more open.
Use better tools than the job seems to need
Many uneven finishes come from poor tools. A cheap roller can shed lint, leave lines, or carry too little paint. A worn brush creates rough edges. Thin masking tape lets paint bleed.
For most Interior Painting work, use:
A medium-pile roller for standard plastered walls
A smaller roller for narrow areas and behind fixtures
An angled brush for corners, trims, and edges
Good masking tape for clean lines
A sturdy extension pole for ceilings and tall walls
Clean trays and liners to avoid dried flakes entering fresh paint
Before dipping a new roller in paint, remove loose fibres by wrapping it with masking tape and pulling the tape away. Lightly dampen the roller with clean water for water-based paint, then squeeze out excess moisture. This helps the roller load more evenly.
Do not overload the brush or roller. Too much paint causes runs, thick edges, and texture variation. Too little paint creates dry rolling, patchiness, and rough marks.
Paint with a wet edge and steady rhythm
Technique affects the final look more than many people expect. Start with cutting in, which means painting corners, ceiling lines, skirting edges, and around switches with a brush. Then roll the larger area while the brushed paint is still wet. This helps the texture blend.
Work in sections about one to two metres wide. Roll in a loose W or M pattern, then fill the space without pressing hard. Finish with light strokes in one direction to even out the texture.
Keep these points in mind:
Maintain a wet edge so new paint blends into still-wet paint.
Avoid stopping in the middle of a large wall.
Do not keep rolling once the paint starts to dry.
Keep pressure light and even.
Stir paint before use and occasionally during work.
Use the same batch for a full wall where possible.
If two cans are from different batches, mix them together in a larger bucket. This is called boxing the paint. It reduces the risk of slight shade variation across one wall.
Ceilings should usually be painted before walls. Paint trims after walls if they need a sharper, cleaner finish. Remove masking tape before the paint fully hardens, or score the edge lightly with a blade to prevent peeling.
Respect drying time, especially in humid weather
Paint may feel dry to the touch before it is ready for another coat. Recoating too soon can trap moisture, drag the lower layer, dull the sheen, or cause poor adhesion. Humid weather, closed rooms, and poor airflow slow drying.
Follow the paint manufacturer’s guidance, but also use judgement. If the room feels damp or smells strongly of paint, give it more time. Use fans for air movement, but avoid blowing dust directly onto wet walls. Keep windows open when outdoor conditions are not dusty or rainy.
During monsoon months, plan painting carefully. Interior walls can hold moisture even if they look dry. A moisture meter is useful for serious damp concerns, but visible signs also matter. Bubbling, salt deposits, musty smell, or repeated peeling point to moisture trouble, not paint failure alone.
Protect the finish after painting
Fresh paint continues to harden after it dries. Treat walls gently for the first few weeks. Avoid scrubbing, hanging frames with tape, pushing furniture against walls, or wiping with harsh cleaners too soon.
For regular cleaning, use a soft damp cloth first. If needed, add a mild soap solution and test in a hidden corner. Do not use abrasive pads on matte walls. Around switches and doorways, frequent light cleaning is better than waiting until grime builds up.
Keep a small labelled container of leftover paint for touch-ups. Write the room name, shade, brand, finish, and date on it. Store it sealed, away from heat and direct sunlight. Touch-ups blend best when you use the same paint and apply it lightly with a small roller or brush. On older walls, a full section repaint from corner to corner often looks better than a tiny patch.
Know when to call a professional
DIY painting can work well for a single room in good condition. Professional help is wiser when walls have dampness, high ceilings, textured finishes, extensive repairs, or multiple surface types like plaster, wood, metal, and gypsum board.
A skilled painter also knows how to sequence rooms so the home remains usable, how to protect built-in furniture, and how to manage edges around false ceilings, wardrobes, and modular kitchens. The difference shows most in the last 10 percent of the work: clean lines, smooth repairs, even sheen, and no messy corners.
Also Read: Understanding the Key Factors that Influence Interior House Painting Cost with Mister Paint
Blog Development Credits:
This blog was envisioned by Soumyajit Sardar, created with research support from advanced AI platforms like ChatGPT, Gemini, and Copilot. Final editing and SEO expertise were provided by Mister Paint.

Comments