
Interior Home Painting Mistakes Homeowners Should Avoid

A fresh coat of paint can make a room feel new in a single day. It can also expose every shortcut taken before the first roller touched the wall. Uneven patches, peeling corners, brush marks, and colour surprises usually do not come from “bad paint” alone. They come from small decisions that seemed harmless at the time.
Good Interior Home Painting is less about speed and more about sequence. The wall has to be ready, the product has to fit the room, and the application has to suit the surface. Miss one of those steps, and even a premium paint can look ordinary.
Skipping wall preparation leads to the most visible failures
The biggest painting mistake is also the least exciting one: poor preparation. A wall may look fine from a distance, but paint highlights dust, dents, oil, moisture stains, and hairline cracks.
Painting over dirt or grease is especially common in kitchens, dining areas, and children’s rooms. The new coat may cover the mark at first, but it will not bond well. Over time, it can bubble, peel, or show dull patches.
A proper prep routine does not need to be complicated:
Wipe walls with a mild cleaning solution and let them dry fully.
Scrape off loose or flaking paint.
Fill cracks, nail holes, and dents with putty.
Sand repaired areas until they blend with the wall.
Remove sanding dust before painting.
The last step matters more than many homeowners realise. Fine dust left after sanding can create a gritty finish and weaken adhesion. A dry cloth, vacuum brush, or slightly damp microfibre cloth can make a noticeable difference.
Another common mistake is painting over damp walls. In many Indian homes, walls near bathrooms, balconies, windows, and external sides of the building can trap moisture. Paint cannot solve active seepage. It may hide stains for a few weeks, but the problem will return. Treat the source of dampness before painting, or the finish will fail no matter how carefully it is applied.
Choosing paint by colour alone can backfire
Colour gets most of the attention, but sheen, paint type, and room use matter just as much. A shade that looks calm on a colour card can feel too dark on a full wall. A beautiful matte finish can stain quickly in a high-touch corridor. A glossy finish can make uneven plaster look worse.
Paint samples help avoid expensive regret. Test shortlisted shades on the actual wall, not just on paper. Check them in morning light, afternoon light, and artificial light. North-facing rooms, compact flats, and rooms with limited natural light can make colours appear cooler or duller. Warm bulbs can make the same shade look yellower at night.
Sheen choice is another place where mistakes happen.
Matte or flat finish works well for ceilings and low-traffic bedrooms because it hides minor wall mperfections.
Semi-gloss finish is useful for trims, doors, and areas that need frequent cleaning.
Satin or eggshell finish suits living rooms and passages because it is easier to wipe without looking too shiny.
High-gloss finish can look sharp but shows surface defects, so the wall preparation must be excellent.
Paint type should also match the room. Bathrooms, kitchens, and utility areas need finishes that tolerate humidity and cleaning better than regular wall paint. Children’s rooms and rental properties may benefit from washable emulsions. For specialised Residential Painting work, product selection often decides how long the finish stays fresh.
Rushing primer and drying time weakens the finish
Primer is often treated like an optional extra. That is a costly habit. Primer creates a stable base, improves adhesion, and helps the topcoat look even. It becomes even more useful when painting over repaired patches, dark colours, stains, fresh plaster, or glossy old paint.
Without primer, patched areas may flash through the final coat. “Flashing” means some spots look duller or shinier than the rest of the wall. The colour can also appear uneven because porous sections absorb paint faster than sealed sections.
Drying time is another quiet troublemaker. Paint may feel dry to the touch before it is ready for the next coat. If the second coat goes on too soon, the roller can lift the first layer or create drag marks. Humid weather, poor ventilation, and cooler rooms can increase drying time.
Follow the manufacturer’s instructions on the tin for recoating. Those guidelines exist for a reason. In monsoon conditions or rooms with limited airflow, waiting longer is often wiser.
A few signs that paint was rushed include:
Sticky or tacky walls hours after painting.
Roller marks that do not settle.
Patchy colour after two coats.
Peeling when tape is removed.
A soft surface that scratches easily.
Good painting has a rhythm. Clean, repair, prime, wait, paint, wait, paint again. Skipping the waiting stages rarely saves time because repairs take longer than patience.
Poor tools and careless technique leave marks everywhere
Paint quality matters, but the roller and brush carry the finish onto the wall. Cheap brushes can shed bristles. Low-quality rollers can leave lint, streaks, or uneven texture. The wrong nap thickness can either underload or overload the surface.
Smooth interior walls usually need a short to medium nap roller. Textured walls need a thicker roller that can reach into the surface. Angled brushes help create cleaner lines around corners, trims, switchboards, and ceiling edges.
Technique matters too. One of the most common mistakes is overloading the roller. Too much paint leads to drips and thick edges. Too little paint creates dry rolling, where the roller drags and leaves patchy coverage.
The better approach is simple:
Load the roller evenly in the tray.
Roll off excess paint on the tray’s ridged section.
Work in small sections.
Keep a wet edge so new paint blends into fresh paint.
Roll from top to bottom with light, even pressure.
Cutting in is another area where patience pays off. Paint the edges and corners with a brush before rolling the larger wall area. Do not cut in the entire room first if the paint dries before rolling begins. The brushed areas can remain visible. Work section by section so the edge and rolled paint blend together.
Painter’s tape helps, but it is not magic. Press it down firmly along the edge. Remove it before the paint hardens fully, using a slow pull at an angle. If the tape stays too long, it can tear the paint film.
Ignoring floors, fixtures, and ventilation creates avoidable mess
Many painting problems are not on the wall. They are on the floor, furniture, handles, switch plates, curtains, and light fittings. Paint splatter travels farther than expected, especially when rolling ceilings or high walls.
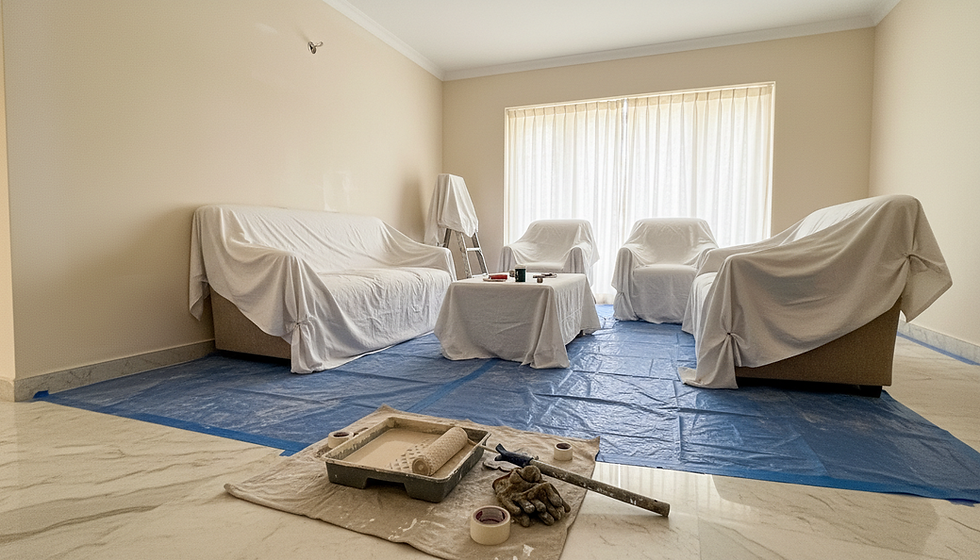
Thin plastic sheets can shift underfoot and tear easily. Canvas or thick drop cloths sit better, absorb small drips, and reduce slipping. Furniture should be moved away from the wall, not just covered in place. If there is no space to move it out of the room, collect it in the centre and cover it fully.
Removing switch plates, curtain brackets, small shelves, and loose hooks often gives a cleaner result than painting around them. It also avoids lumpy paint edges. Keep screws and fittings in labelled containers so reassembly is easy.
Ventilation helps paint dry and reduces lingering odour. Open windows where possible, but manage dust. A dusty breeze can stick particles to wet paint. Fans can help airflow, but they should not blow directly onto a freshly painted wall at high speed. That can dry the surface too fast and leave lap marks.
Lighting also deserves attention. Painting in dim light hides missed spots. Use bright, angled light to inspect the wall while working. This is especially useful for pale colours, where thin patches are easy to miss until the room is fully furnished again.
Forgetting the final inspection makes small flaws permanent
The best time to correct a painting mistake is before the room is put back together. Once furniture returns, curtains go up, and daily life resumes, small flaws tend to stay for years.
After the final coat dries, inspect the room in different lighting. Look at the wall from the side, not only straight on. Side light reveals roller lines, raised dust, missed corners, and uneven patches.
Check these areas carefully:
Corners near the ceiling.
Edges around doors and windows.
Wall sections behind furniture.
Spaces around switchboards.
Repaired crack lines.
Areas where tape was removed.
Keep a small amount of leftover paint in a clearly labelled airtight container. Write the room name, colour, brand, finish, and date on it. Touch-ups are much easier when the exact paint is available. Store it away from direct heat and sunlight.
Final Thoughts
A well-painted room is the result of dozens of small, sensible choices. Clean walls. Correct primer. The right sheen. Patient drying time. Good tools. Careful protection. None of these steps are glamorous, but they are the difference between a finish that looks fresh for a few weeks and one that holds up beautifully.
The safest way to avoid mistakes is to slow the project down before it begins. Plan the room, test the colour, prepare the surface, and respect the drying time. Paint rewards patience. The wall will show every shortcut, but it will also show every bit of care.
Blog Development Credits:
This blog was envisioned by Soumyajit Sardar, created with research support from advanced AI platforms like ChatGPT, Gemini, and Copilot. Final editing and SEO expertise were provided by Mister Paint.

Comments